Showing posts with label levels. Show all posts

Thursday, October 30, 2008

Differencing Gradients

I experimented with gradients recently, and discovered a neat way to mix them.
If you create a series gradients, each on its own layer, with blending mode set to difference, you'd see them combine with each other. They kinda inverse where they overlap, and experimenting with different ones you can make all kinds of neat things. This is one I
did in studying gradient. There are probably far more complicated and more interesting designs; I just gradually gained an aim with this one, so I didn't stray from what I had begun to envision.

Image>Adjustments> Levels... is a powerful tool if you practice using it. It can help you give cool colors to abstract art. Try changing the red, green, and blue values (from the RGB dropdown menu) in relation to each other. You get flame red,orange, and yellow if you give red 0-85, green 85-190, and 190-255, without moving the gray bias arrow.
I've previously talked about how levels can imrove quality; it can create something entirely new, too. I'll probably add some stuff to this pic later- you can always fine something neat to add; just don't limit yourself to a specific tool/technique or part of the image. Do random stuff; after a while, go back to old things and see if you have new ideas!

Wednesday, October 22, 2008

Photoshopping Photography

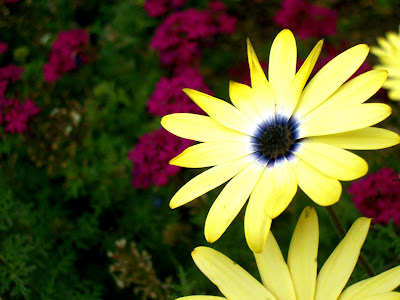
I have been submitting some of my photography to DeviantArt. I've been enhancing the color on some of them, and have found two very important tools for doing so.
You can make any clear (as in not blurry) photograph have great lighting.
All you need is image>adjustments> levels... (or Ctrl L / Command L).

You bring the outer white and black arrows to where the graph begins and ends. You do it for each of RGB, Red, Green, and Blue, choosing them from the top menu. Then you have to slide the middle ones until you get the "correct" colors you're looking for. Do the RGB one last, as doing the other three increases the brightness. That's all RGB will most likely do, and in combo you may go overboard. Afterward, going to image>adjustments>brightness/ contrast... you can fix the brightness properties as you desire. As you might notice, the bottom one is quite an improvement from the top. I didn't do very much, but the improvement is awesome.

Saturday, October 18, 2008

Photoshopping People

I've been working on learning to photoshop people, particularly people.

One notable example is some photoshopping i did of a friend, for fun. She asked me to send a few examples to her.

I think I understand the relationship girls have with makeup now. It's a pain, but once you start, you don't want to stop, and you're never satisfied. No matter how beautiful someone is at point A, you always want to move further and further past point B; sometimes you even do more harm than good...

The most important tools for working with skin are:
  • dropper+brush, for smoothing
  • clone stamp, for replacing hard-to-brush-over areas
  • patch tool, to replace funny shaped areas
  • and making a new layer+coloring it+lowering opacity for lipstick, eyes, highlights and shadows, and other coloration changes.
I won't post exact pictures, but I will give another big piece of advice: isolate individual parts, so you can play with H/S/L and Brightness/Contrast and Levels.

If you do that with hair, you can pick whatever natural hair color you want. or something else...